How to Use Resistance Bands for Beginners: A Friendly Guide
Hey there, fitness enthusiasts!
Are you tired of the gym’s same old weight machines and free weights? Or maybe you’re like me and just prefer working out at home or on the go.
Either way, finding some inexpensive equipment to push you harder is important for success.
For this, you may want to check out resistance bands!
As someone who has been using resistance bands for years, I can assure you they’re a fantastic addition to any workout routine.
However, I understand they may seem intimidating at first, but fear not!
I’m here to show you the proper way to use your resistance band and get the most out of your workout!
How to Choose the Correct Resistance Bands
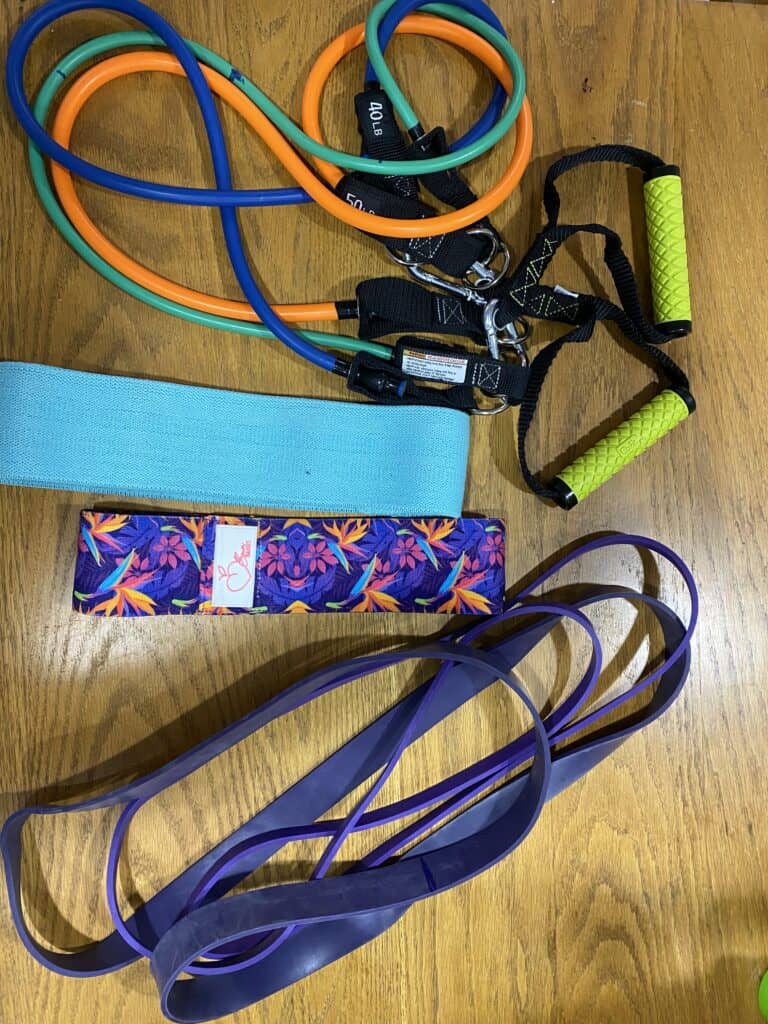
When it comes to resistance bands, there are several styles and levels of resistance to choose from.
To pick the right bands for you and your fitness level, consider the following questions:
What Is Your Fitness Level?
As a beginner or someone returning to fitness after an injury, it’s best to start with a flat TheraBand and/or a loop band.
If you’re already into fitness and workouts but want to try alternatives to free weights, you may want to consider tube bands, booty bands, and/or pull up assist bands.
How Do You Plan to Use Resistance Bands?
Think about how you plan to use resistance bands.
Are you looking to use them for warm-up and cool-down exercises, or do you want to improve your range of motion and strength?
Maybe you’re looking to include resistance bands into a training program for sports like running or balance.
Of course, you may just want to use resistance bands as the sole focus of a fitness routine or add resistance to your current program.
Get a Range of Resistance Bands
To get the most out of resistance bands, it’s best to have a range of at least 3-4 bands with different levels of resistance.
This will allow you to progress and advance in your workouts.
When you only use one level of resistance, you will limit your progress if they are too light or cause injury if they are too heavy.
Different resistance levels are helpful for giving you enough of a challenge for some exercises and allowing you to choose a lighter resistance for other exercises to avoid injury.

Choose the Right Resistance
It’s important to choose the right level of resistance for each exercise.
If the band is too light, you won’t get any benefit. On the other hand, if the band is too heavy, your form may suffer, which could lead to injury.
It’s best to start with a lighter resistance and work your way up as you become stronger and more comfortable with the exercises.
Try Different Types of Bands
Resistance bands are relatively inexpensive, so it’s worth investing in a few different types and tension options.
This will allow you to try out different exercises and find what works best for you.
With a range of resistance bands, you’ll be able to add variety to your workouts and continue to challenge yourself as you progress.

4 Reasons to Consider Resistance Bands for Your Fitness Journey?
As a fitness enthusiast, I have found resistance bands to be a huge addition to my workout routine.
Why, you ask?
Here are some great reasons:
- Joint-Friendly: Resistance bands help stabilize muscles and tissues that hold your joints in place, reducing the stress on your joints during exercise. This makes them an excellent option for those recovering from injuries or with joint pain.
- Injury Prevention: With resistance bands, you can easily adjust the amount of resistance applied to a body part. This allows you to avoid overloading muscle groups by lifting too heavy of a weight, reducing the risk of injury.
- Versatility: Resistance bands can target a wide range of muscles and can be used in several different planes, unlike free weights that can only go up or down with gravity.
- Cost and Convenience: Resistance bands are an affordable alternative to free weights or workout machines. They are also compact and easy to store, making them a great option if you have limited space. Plus, they are easy to take with you wherever you go, so you can get a workout in anywhere.
So, give them a try and see how they can help with your fitness journey!
How to Use a Resistance Band
Safety First
Before starting any exercises with a resistance band, it is important to make sure that the band is secured correctly.
Unlike free weights, resistance bands need to be secured to prevent them from snapping back and causing an injury.
If you are securing the band with a body part like your feet or hands, make sure it is secure by placing the band under the mid to back of your foot and holding it tightly in your hands.
You may even need to wrap the band around your hand or foot to secure it better.
If attaching the band to a surface such as a pole, chair, or railing, make sure it is securely attached to avoid snapping back.
Inspect the band regularly if you have been using it for a while. Over time, a weak spot can occur, which could cause the band to break and snap back, causing injury.
Invest in your safety and replace your bands as needed.
If using the band outside, choose a smooth surface to put the band on or around.
Avoid rough surfaces such as concrete, trees, or a parking lot. If these are your only choices, put padding like a yoga mat between the surface and the band to protect it from weakening or breaking.
READ MORE: Can A Resistance Band Break And Snap Back? | Simply Aging Healthy
Find the Correct Resistance for You
Choosing the right resistance band is important to prevent injury and strengthen the proper muscles.
If you’re new to a strength program or normally use lighter weights, stick to a very light to medium band.
However, if you’re already in a fitness program and lift heavier, you may want to pick up a medium or heavy band.
Remember that this is not a one-size-fits-all issue; it is completely individual.
So, do not cheat yourself. If the bands are too light and does not give you enough resistance, you will not get the gains you are hoping for.
On the other hand, if they are too heavy, you may have to compromise your form or cause your muscles to snap back, causing injury. Make sure you have smooth, fluid movements.
You’re not married to the bands, so change them for a different resistance as needed.
You don’t want to become frustrated and decide not to give the bands a chance.
Don’t Be Afraid to Markup Your Bands
When lifting weights, both sides are equal if you pick up equal weights.
However, with a band, if it is not centered, you may work one side of your body more than the other.
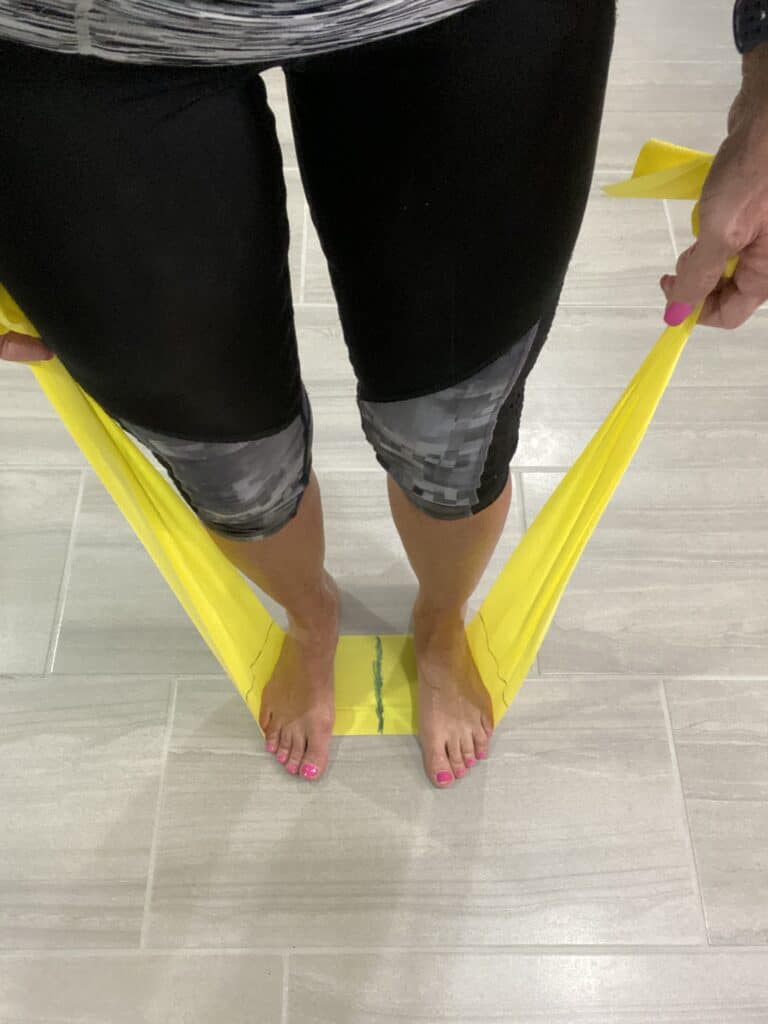
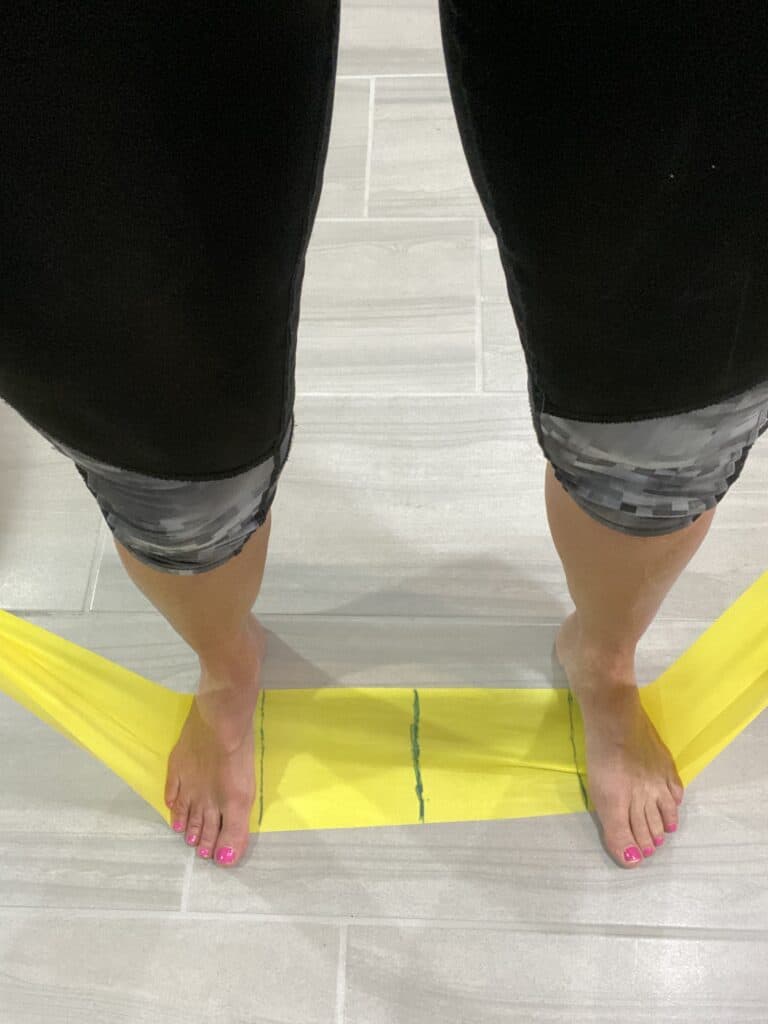
If you are using a flat band, place a mark at the center and then six inches on either side.
This allows you to place your feet equally in the center of the band or at hip distance.
The markings help you apply equal pressure on both sides when you hold it.
Proper Body Alignment While Squatting
To avoid injury and have proper form, you need to make sure that your shoulders and hips align with your feet.
Be sure that you are hip distance apart or shoulder width apart for squats.
Don’t be afraid to use a mirror to check your form.
Change Foot or Hand Placement to Change Resistance
Unlike weights, resistance bands make it easier to change the resistance.
If the resistance is too light while the band is under your feet, move your feet further apart. This will add more tension to the band.
If the band is too heavy, move your feet together to lighten the resistance.
If you are holding the band with your hands, it’s the same concept.
Move your hands closer to the center for more resistance and further away from the center to decrease tension.
3 Ways to Secure Your Resistance Band at Home
When it comes to working out with resistance bands, it’s important to have a secure anchor point to prevent injury and ensure effective exercise.
Here are three ways to secure your resistance band at home:
- Attach resistance band to a secure surface: For flat bands, you can wrap the band around a solid piece of furniture or a smooth pole like a stair railing. With loop bands, you can secure them by looping them around an object and through the band. You can also tie a knot in the band and place it in a door frame.

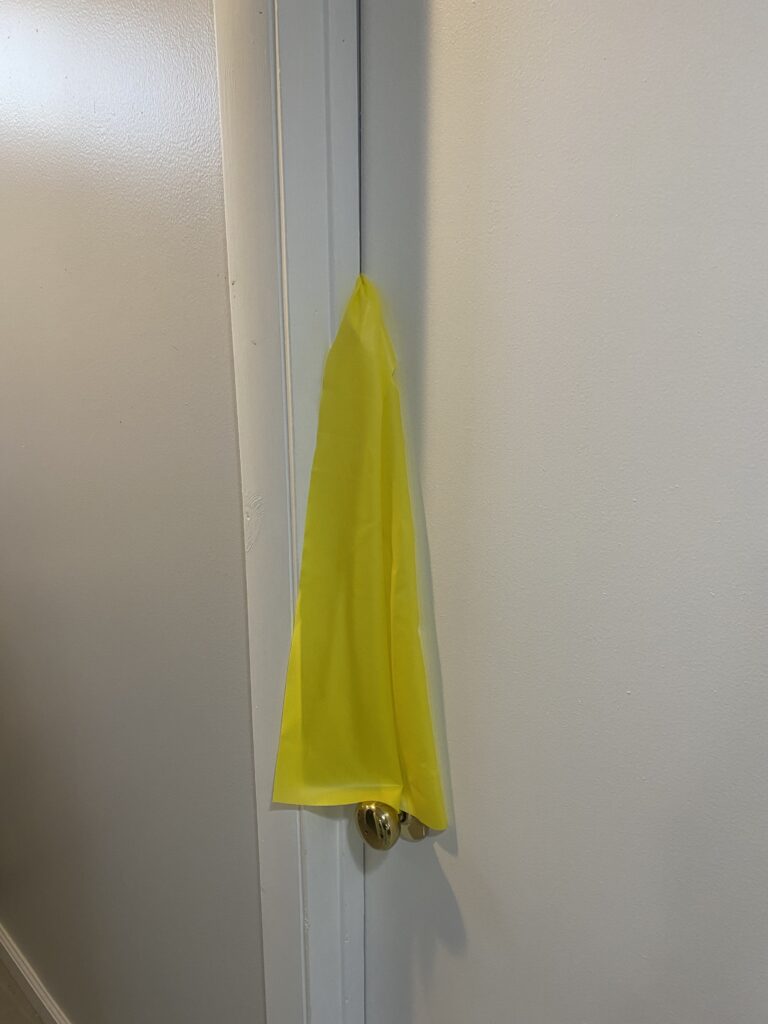
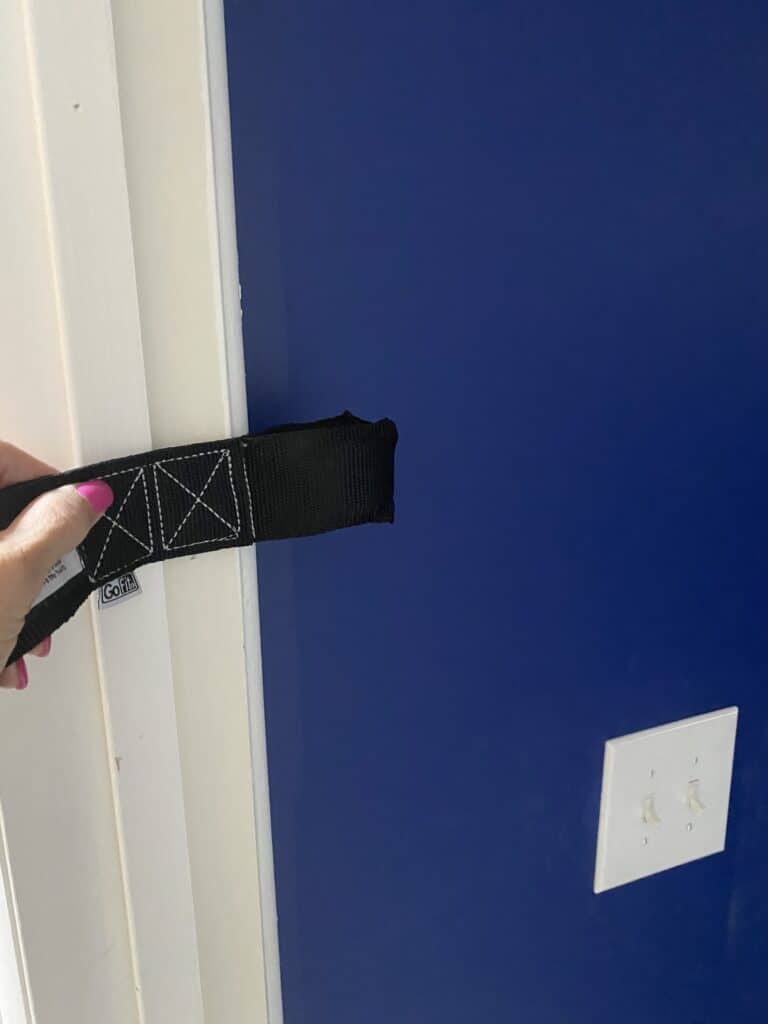
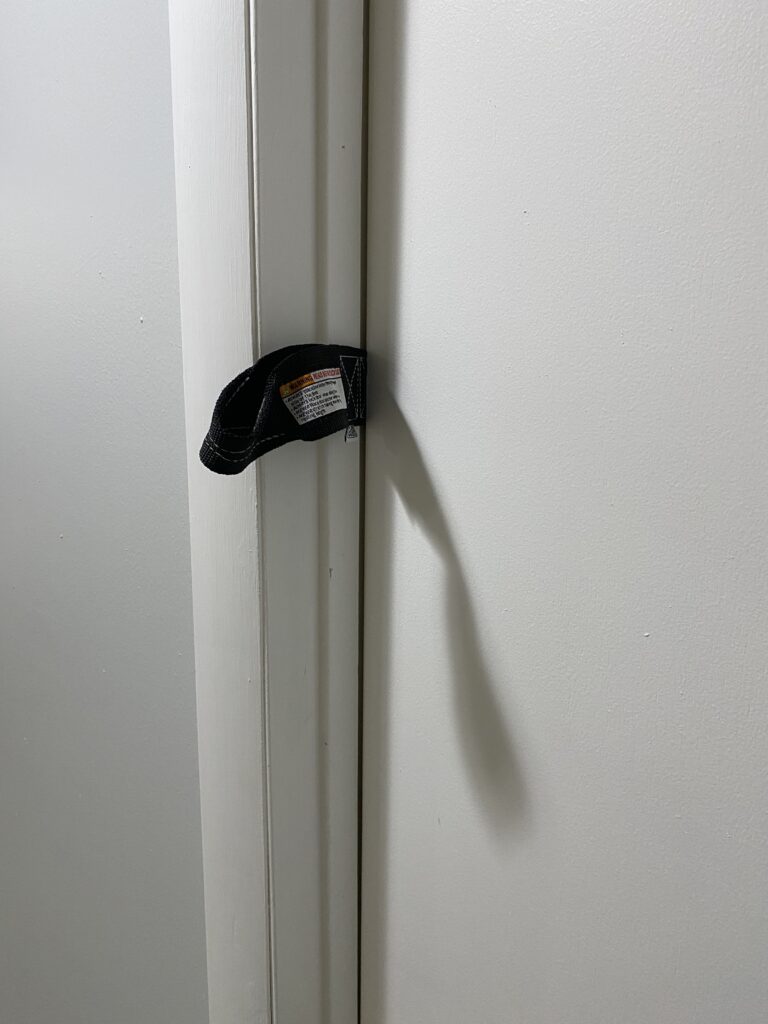
2. Use a Door Anchor: Open the door you want to use and place the anchor end of the door strap at the preferred location in the open door. Hold onto the loop and close the door with the loop end of the strap on the side you are standing on. Pull to ensure that the anchor is snugly in the door and attach the resistance band to the door strap.
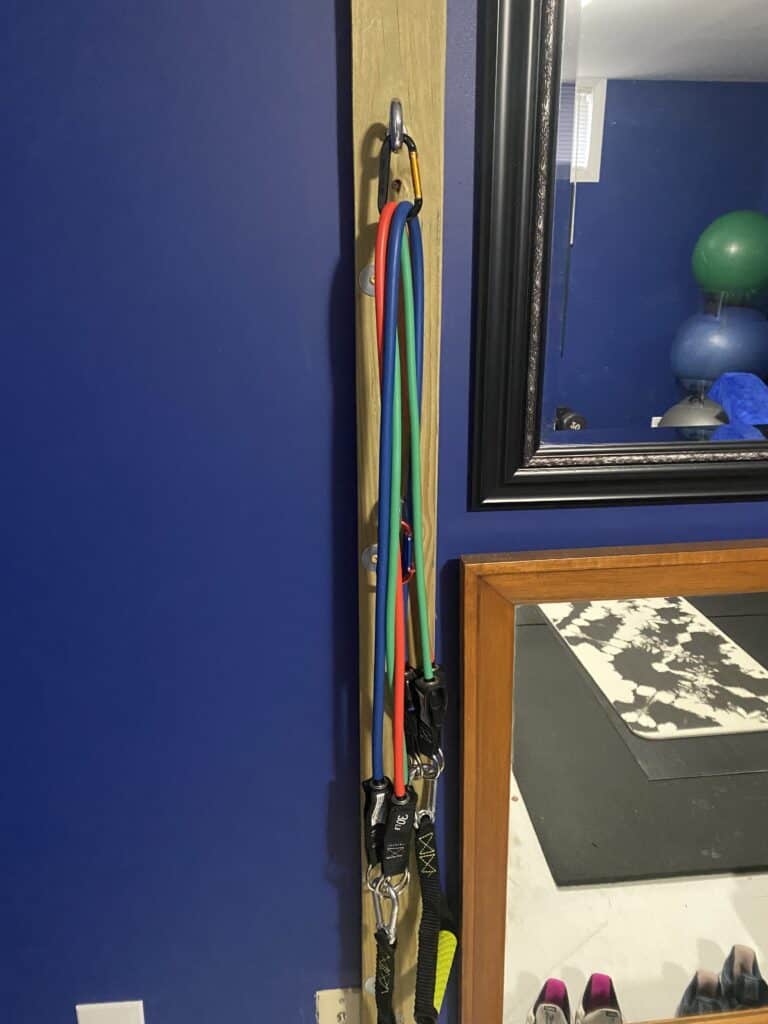
3. Build a Resistance Band Wall Station: A DIY project can be done by using a treated 2×4 cut to the room height and placing eye hooks at five different levels. Carabiner hooks can be used for bands that won’t go through the eye hooks. Alternatively, you can purchase a resistance band wall station.
By using these methods, you can safely and effectively incorporate resistance bands into your home workout routine.
Conclusion
In my experience, resistance bands have been an excellent addition to my fitness routine.
Choosing the right band for your fitness level is important in order to see results.
By including resistance bands into your workouts, you can effectively target and strengthen specific muscle groups.
When used correctly, resistance bands can be a valuable tool for anyone looking to improve their fitness.
